Sunday, October 11, 2020

All We've Learned about Dog UTIs so Far

Urinary Tract Infections or UTIs are extremely common among senior humans - and it turns out, senior dogs as well. Humphrey had a little experience with a few aged human relatives, and then before his eyes he was a victim!

Some people say that once an older human has a UTI they never really get rid of it. All healthy people and dogs have bacteria in their urinary tract, and become prone to infections when the natural flora and immune system lead to over-production of those bacteria. Natural changes in age and conditions like diabetes make a person or dog especially prone to these infections. 

It started with increased thirst, and an urge to urinate RIGHT THIS SECOND. Humph went to his vet to find out what was wrong. Since it was close to his physical anyway, he had full blood work which ruled out a lot (it was perfect). Next came urinalysis...

Humphrey's beloved veterinarian he shared an important piece of information about UTI diagnostics with us! When the veterinarian's office takes a urine sample, they dip a test strip in to determine various parameters (Leukocytes, Nitrite, Urobilinogen, Protein, pH, Blood, Specific Gravity, Ketone, Bilirubin, and Glucose). Anything out of the normal range can indicate a problem - ranging from high blood glucose, to ketoacidosis, to a UTI.

This specific test costs about $40 or $50 in the vet's office, but we learned that you can just purchase a jar of the test strips for under $15! The test strip is a piece of paper, and you can hold it under a person or dog's urine stream instead of collecting in a bottle.


Anyone with an aging parent or dog will find these particularly useful (and potentially huge savings). We got ours through Amazon, but most pharmacies and some health food stores sell versions of them.

However, the strips only let you know "Yes or No" to the burning (he he) question. The next step is to culture the sample to determine WHAT bacteria is present in the urinary tract. Unfortunately, Humph can't do this at home! And it ain't cheap.

The type of bacteria present determines the treatment - which is almost always antibiotics. While vets usually prescribe a week or two of antibiotics, we learned from our online forum that in practice, it usually takes two courses to clear up a UTI (which is what happened with Humph). We learned that about 90% of UTIs in people or dogs are caused by ecoli.

People prone to UTIs often take concentrated cranberry supplements daily as a preventative measure - these are NOT suitable for dogs. They are effective (in HUMANS) because cranberries contain various  natural substances or chemicals that prevent bacteria from sticking to the urinary tract and multiply, thus flushing them out. Cranberries also contain a good amount of salicylic acid which has additional benefits.

However, dogs (and humans) can take D-Mannose, which is one of the substances found in cranberries, available as a supplement in hugely concentrated amounts. To reiterate, D-Mannose contains one of the substances in cranberries, but not all of them. People (and some dogs) consume it daily as a preventative for UTIs  (in place of cranberry pills), or over several days once a UTI is active. It's also used for other conditions, including for those who do not absorb protein well in the digestive tract - in this way it can act as a prebiotic. It appears to also have diuretic properties.

The research evidence for D-Mannose is strong - for example, a relatively recent randomized control trial (RCT - the gold standard  for evidence) points to its effectiveness as a preventative measure for recurring UTIs. It is a promising treatment for acute UTIs, possibly eliminating the need for antibiotics (there's a lot more published research on this - but Humphrey is too tired to summarize it here, and recommends readers do a search on Google Scholar to review the most up to date publications).

D-Mannose comes in powder form (colourless and tasteless when dissolved in water) or capsules. Humphrey tried Now brand powder but his human Granny stole it from him because she found it effective not only for UTIs but also for her aging knees (the diuretic helps with excess fluid!). The human takes 1 teaspoon, while the recommended dose for small dogs is about 30 grams (or less than 1/16 of a teaspoon!) according to Humphrey's online forum - which means he got some nifty, dog sized measuring spoons!


Tuesday, August 18, 2020

Diary of a swimming pool renovation

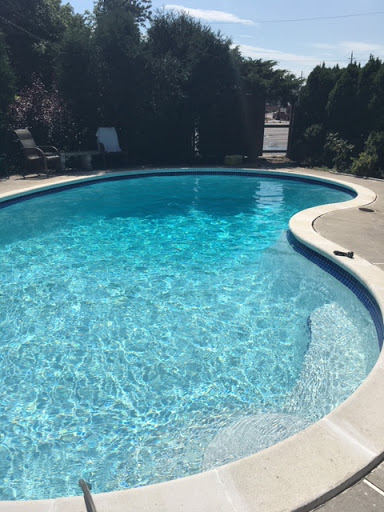
Once upon a time, there was a lovely pool in Humphrey's garden. It was built in 1974, and fashioned from gunnite and marbelite. The gunnite concrete was 2 feet think! He often wondered if Jimmy Hoffa lived there.


Sometimes, Humph swam at night.


But, as the years went by, the marbelite surface wore down and it needed renovation. In the 1990s, only one company in the entire county repaired concrete pools! The only surface they offered was a fibreglass polymer paint called Inter-Glass, but it seemed like a good idea with its lifetime warranty.

Next thing you know, the company (which was subcontracted by a legitimate pool company in the area) went belly up and nobody would honour the warranty. A lot of townspeople found themselves in the same situation. The fibreglass polymer was popping off the gunite! People had big gaps at their tile line. The coping stones moved around, and there were gaps everywhere. In placed (such as on the steps) the fibreglass popped off altogether! A guy named Larry went from pool to pool, and bolted the fibreglass to the gunite, and then caulking the gap. It looked awful, and the bolts on everyone's pools eventually rusted. But there was nobody to repair the surface, let alone Larry's repairs!


Even though the pool was a problem, it was mostly functional. Humphrey continued to do his Dog Science Lab experiments that involved gravity and "sinks or floats" hypotheses. Spoiler: the rubber frog floats, but the solid Gumby toy sinks.


Humphrey searched tirelessly for two years, and finally found some retired pool experts to restore the pool to its glory! The experts happened to be the ORIGINAL installers from 1974! They ranged in age between 70 and 90, and were the most charming group of Paisan's Humphrey ever met.


The experts did not which to do demo, so Humphrey had to hire different contractors - not an easy task for a messy job. Larry came to the rescue (sort of) to remove the fibreglass so that the experts could do their thing. The demo was a huge challenge, because the fibreglass was stubborn. Humphrey called pool experts in Illinois and Florida to get advice to pass on to Larry. In the end, they used a combination of blowtorch, angle grinding by hand, and sandblasting.


The demo took about two weeks. Next, the Paisan's came around. They did some little repairs to the pool mechanics.

The first task was to remove and re-set the coping stones. Coping is the material to cap the pool's edge (in this case, it was two-foot stones) to seal the side of a concrete pool, prevent splashing out, and to direct the water that does splash out away from the pool. The original, 1974 coping stones remained in good shape, so they were removed and re-set with cement. These shots show the coping removed from the edge, and scaffolding that was set up in the deep end.

Quite surprisingly, only one section of pipe needed to be replaced, so the contractors removed a section of cement deck, dug out the section of pipe, replaced it, and repaired the concrete.


Next, they removed the old, turquoise mosaic tiles, and replaced with larger (2 by 2), dark blue tiles:
Once the coping was set, and the tiles were set and grouted, the new surface came on in two stages over three work days.

First, the workers applied a scratch coat of plaster on the entire surface. The scratch coat cured for 3 days, then the marbelite surface (a composite of cement, white sand, and marble that is especially durable) was applied. Marbelite is a little more expensive than other pool plasters, but when applied correctly and cared for will last about  30 years. Next, a crew of two applied the marbelit to the steps, and let it dry overnight. Finally, a crew of 7 worked one day to apply marbelite to the entire surface in one day. Everyone had a task, and they were efficient and precise.


Twenty-four hours later, a truck arrived with 15,000 gallons of water! To figure out how much Humphrey needed to order, he multipled the pool dimensions (30x15) times a factor of 7 for the kidney shape.

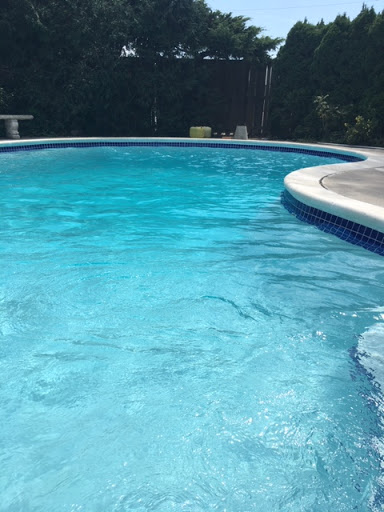
Some chemicals went into the pool, and it was ready for swimming (though cold!) that day!


Soon, the water will warm up, Humphrey will update the landscaping with lots of peegee hydrangeas, and he'll be running to the pool like he used to:


Thursday, July 16, 2020

Managing Canine Eye Gunk

Eye gunk seems to be a pretty universal problem, especially for dogs with light colored coats where discoloration is very obvious. Humphrey has had a few inquiries lately, so this post is for those who asked.

Upon the advice of the veterinary ophthalmologist, we follow a fairly simple protocol that works. It requires cleaning at least a couple of times a week (sometimes daily) and a few provisions. We keep the following on hand for Humphrey:
  • Cotton pads (the kind you find in a cosmetics department)
  • Eye makeup remover (the variety that works on waterproof mascara)
  • A glass eyedropper, preferably with a glass bottle, like this one. They are inexpensive in most health food stores
  • Sterile eye wash (available at the human pharmacy), such as Optrex
  • Plain Vaseline 
  • Lubricating eyedrops, such as Systane or Genteal
The first goal is to remove any crusty debris around the eyes - it can be really uncomfortable for a dog! One might  leave any cutting to a groomer, but we have been able to remove most or all of it without resorting to scissors. Once it's clean, you have to be diligent in maintaining to avoid more crust. Here's the procedure we use for removing the crust around Humphrey's eyes:
  • Wet several cotton pads with warm water. Use these as a compress on the eyes to soften or loosen any crust. At first, the dog may not love it, but keep trying even if you are only putting the pad on one eye at a time for a couple of seconds. Anecdotally, most dogs come to enjoy a warm compress. Don't press or rub, just let the water penetrate the crust gently.
  • Once you have moistened the crust, use either eye makeup remover or Vaseline to get it off. We put eye makeup remover (it removes the brown stains!) on a cotton pad and ever so gently start working on the spot - not pressing hard, and gently wiping, being sure not to get anything into the dog's eye. It usually takes several applications. For Vaseline, I put a dollop on the back of my own hand, and take the  tiniest amounts to work into the gunk with my finger. I usually have to massage the crusted fur to get it in. Eventually, the  debris loosens up, and I wipe it off the excess with water. If there's a lot of debris, I repeat the process over several days. Be patient, take your time, take breaks, and be gentle.
  • Once it's cleaned up, I apply a tiny bit of Vaseline to the part of the fur where the debris typically accumulates to prevent any new pieces from drying out and sticking. Humphrey was diagnosed with blepharitis (a chronic inflammation of they eyelids and/or lash line), and an effective treatment (for humans, too!) is to regularly apply the tiniest swipe of Vaseline to the lashline to keep debris from getting into the eye and irritating it. 

While cleaning the eyes, I always check the sclera (whites of eyes). If it looks red or irritated, it could be allergies/blepharitis or the result of a scratch to the cornea. If it is chronic or very inflamed, it may be time to see a vet.

Here's the procedure we use for maintaining Humphrey's eyes once they are cleaned up (though sometimes I slack off and he winds up with more crusty debris!):
  • Every day or two, use a cotton pad with warm water to wipe away excess debris. If it is crusty, remember to apply the cotton pad like a compress to loosen the crusted debris
  • Gently wipe away loosened debris
  • If the eyes seem to need it, we flush with sterile eye wash - BUT we're careful not to do this too often, since over-use of eye wash can dry the eyes out (I'm not sure why!). However, we know that Humphrey's eyes get irritated  during pollen season or when the grass is freshly cut, so  we use it if there's a probability that allergens got in his eye to flush them out before they cause excessive tear production or irritation. 
On a final note, while Humphrey uses Vaseline about 90% of the time, once in a while he gets very expensive (prestige Estee Lauder) human eye cream on the fur under his eyes to keep them clean. It's a little less greasy than Vaseline and is formulated for the eye area. So far, it has not caused problems.

It's a commitment - daily or almost daily - to keep Humphrey's eyes clean. In the end, just wiping them with water is the best preventative process for him - but environmental factors mean that debris leading to the eye gunk is inevitable once in a while.


Monday, June 1, 2020

The Little Spaceman: Humph's adventures with red light (near-infrared) therapy

In the past couple of weeks, Humphrey has had a few inquiries about the red light/near-infrared therapy he's been undergoing. 
This is the $35 bulb Humphrey is currently using.

NASA developed red light technology
 (also see this) to help plants - and eventually people - while in space when they do not have access to sunlight. Basically, NASA discovered that the long wavelengths of LED red light penetrate deep into body tissue, stimulating cell activity. Because fo that, it can treat various injuries, wounds, burns, neuropathy – all areas where large body areas are involved. Red light also simulates hair growth.

In the past twenty or so years, the effects of read light (also called near-infrared) have been extremely well researched in the medical community, and results for certain benefits to the human (and animal) body have been well-documented. You may recall that we consulted research for dog alopecia not long ago (there's not a lot on dog hair loss to date, but the research so far is promising).

The most popular commercial use of red light therapy to date appears to be for its anti-aging properties. Shining the right red LED frequency stimulates collagen production in older cells, leaving skin looking plump and reducing wrinkles. It also has been effective in treating acne. The technology resulted in all kinds of products for the face. Many small products that have frequencies that only penetrate the top layer of the skin are available for anywhere from $50 to several hundred dollars. At the time of writing, the Silk'n is probably the most popular at-home option (though one of the pricier ones). A cheaper option that works the same way is the Tanda. Similarly, commercial devices in the shape of caps to stimulate hair growth are available.

Some advocate for using dermatologist-quality devices, which are larger, stronger (because they usually contain more LEDs) and some use longer wavelengths to penetrate deeper. This is a great, plain-language article about cosmetic/face use.

The more important uses for red light therapy are not cosmetic. Red light therapy benefits cancer patients and diabetics who suffer from neuropathy (must be 800-900 nm wavelength to be effective).
It also aids in healing tissue injuries, including muscle injuries.  It seems to be routinely used in dogs with knee (CCL) injuries to speed the healing. I don't have the research at my fingertips, but will update at some point. Red light therapy will not cure anything, but will help the body heal faster by feeding the cells so that they do their work.

So far, decades of research show no damaging effects. LEDs are low temperature, so the lamps do not heat up, there is no chance of burning. They do not contain and UVA or UVB, so no threat of cancer or burn exist.

In terms of devices - the important thing is to obtain a device that has the RIGHT wavelength for what you want to achieve. For example, Silkn or Tanda for the face might not have the correct wavelength for a deep tissue injury. Once you have the right wavelength, the strength of the device also has to do with how many individual LEDs make up the lamp. More LEDs mean more strength. More strength means less time you need to devote to it. Similarly, the distance from the affected area affects how much time you need with the red light. The farther away from the body and injury, the more time you need.

When a decent strength red light is used at a close distance, the length per session (even for a deep tissue injury) is usually not more than 15 minutes at the site of the injury. However, a weaker lamp or a distance that's not right against the skin might require 30 minutes per session. The facial devices recommend only about 2 minutes when the device is right up against the skin.

Humphrey usually naps while receiving light therapy.


An inexpensive way to try red light therapy is a bulb - the least expensive options are on Amazon, for example, this one in the $30 range (pictured above). Of course, you need a base for the bulb (it screws into a standard socket), and then you need to set it up accordingly. This one has 2 wavelengths: Deep Red 660nm (surface) and Near Infrared 850nm (deeper tissue). If you are buying online, read the specs carefully so you get the correct wavelength, and that it's a bulb or device for human (not plant) use. The inexpensive lamp does not have all that many LEDs, so it requires more than a couple of minutes of contact time to make a difference. We have used this one for a dog (hair), and a human (chemo neuropathy). At least at first, daily for a minimum of 15 minutes per spot is necessary, then the frequency can be reduced to a couple of times a week. If he had unlimited funds, Humphrey would probably purchase the Joov (which is a commercial/consumer product with greater strength, but very pricey).

UPDATE "BRAIN PHOTO-BIO-MODULATION":

Some studies are showing that red light use MIGHT offer some modest help with people who suffer from various dementias - Major Cognitive Impairment (MCI, which is a  general dementia, and affects the front of the brain)  and Alzheimer's Disease (AD, which seems to affect the back of the brain). The red light (near infrared frequencies) appears to help with oxygenation in the brain. The therapeutic approach is called "photobiomodulation", and involves exposing the brain to near infrared.

In 2015, a study on mice found that near infrared helped mitigate loss of oxygen, affected the "tangles" associated with dementia, and offered some general protection. For reference, mice with dementia received 90 seconds of 670nm frequency, 5 days a week for 4 weeks and then the results were analyzed.

A 2018 "narrative review" explains how near infrared works with respect to the brain, also discusses the challenges of delivery (that is, to get deep into the tissue). 


Finally, this 2019 paper summarizes research to date on photobiomodulation for dementias  (also this 2019 paper and this one as well)- noting what I found which is that studies on humans are small and not great methodologically, but there's a pretty robust literature with animal trials that is very promising. 

THE VERDICT: early research, especially on animal brains, is very promising; the poorly designed studies on humans support what researchers have already found with animals. Given no side effects and relatively low cost, it's probably worth it for dementias.

SUGGESTIONS GLEANED FROM THE PUBLISHED LITERATURE TO DATE:
  • Generalized dementia: frontal cortex; Alzheimers, back of head, though for humans nasal route has been used because it's difficult to penetrate very deeply through bone and tissue. This may or may not be the same for animals who presumably have much less tissue.
  • Frequency should be in the 670 range (at least) to penetrate (that is what they used for mice)
  • The amount of time in studies varies - but probably 5 days a week, for at least 5 minutes would make sense; minimum 4 weeks, probably more like 12 weeks.